


's Blog
Some surprise
I promissed to create only male models but you probably have notice that I have a weak for some actors =) I couldn´t resist Chase Crawford and Tom Welling! Well Tom was a model a long time ago so.... I have an excuse ;)
Happy simmings
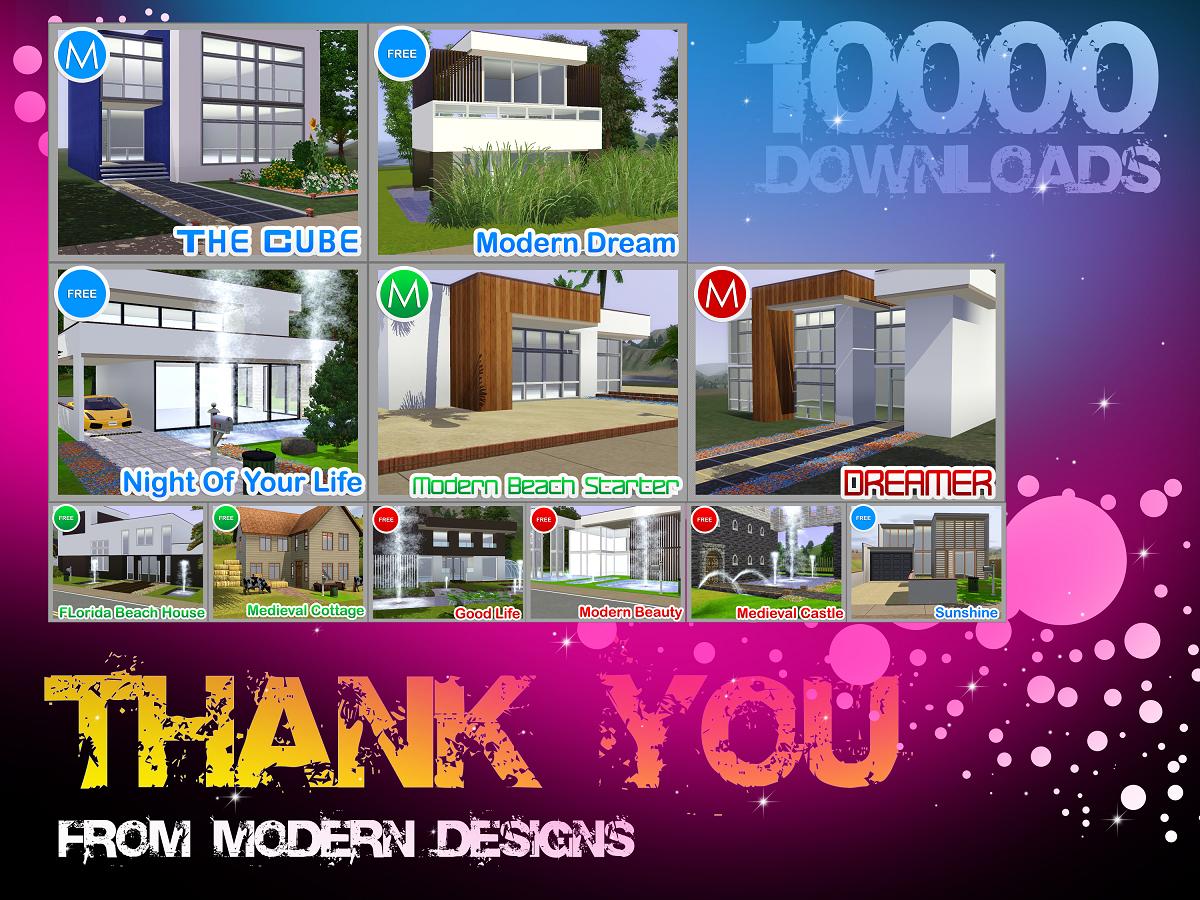
10000 DOWNLOADS!!!!!
Hey Everyone! Thanks for the 10000 Downloads!
Heres A Little Prezzie For All Of You, A Wee Peek Of My New Projects Being Published To TSR In The Next Couple Of Weeks! :)
Thanks so much to everyone that downloaded one of my creations! Happy Simming! And Have A Amazing Day! :)
Thanks So Much!
Blake :)
clothes
i am slowly making clothes for here. they are taking me a bit as i am learning on making the clothes.
it seems constructing houses and interior design come quicker to me.
houses
i am working on some houses and hopefully soon they will be up for download. i am working on building them first. then i will furnish them and have some rocking pics for them. i am trying to come up with some different house ideas. a few of them are a bit country looking with shaker wood sided and such.
Doug Pickett
Ok guys, now working on Doug Pickett! Almost done for upload. Everybody knows him from Ralph Lauren Campaigns, but if you don´t, take a look

Upcoming Martini Lounge and vampire Lounge. Two in one.
Look for my Lounge coming out for downloading on Jan. 17 2011. It has two lounges in one. A modern, classy lounge with a hot tub, dance floor and converstion couches. The Vampire Lounge is mysterious and dark, but not too dark!
Glad you appreciate my creations...
It's a pleasure for me to see, that my published houses are of big interest for many members on TSR...Thanks for everyone who posted a feedback and downloaded my houses... so that they've brought once again 40,000 incentive points ;)
The Art of Amanda Hone!
I am so very excited to announce my new Showcase of Paintings by the Beautiful Artist -- Amanda Hone!
I fell in love with her Art the second that I layed my eyes on it and I am very proud to share it all with everyone here on TSR! Please visit my Minisite to catch a glimpse of her AMAZING work! You can visit Amanda at www.amandahone.com -- Enjoy!! :)
~ Angela

Useful stuff 2-Clothing tut 1 pt2
Here's long awaited second part of clothing tutorial.I decided to write a third part about photoskinning since this time i'll use even more pics.
So..here we go.
1.open any search engine you fancy.I love google.And enter fabrics textures,textures of fabrics or something like this and use images search 
2.then,pick ones you fancy and save them to your pc
3.Go to bodyshop.
Objects/New Project/Clothing
=)
For this tutorial i'll use another basegame outfit but you can use any other
6.Again,use name that will give you info about your creation.Its useful when you're going to upload your creations.Lets name it clothingtut2
7.Go to My Documents/EA Games/The Sims 2/Projects/Clothingtut2 (if you named differently,use the name you've picked).
We'll need the texture file
8.Now,open all the files you'll need to create outfit
(now you may skip to 11th step if you arent going to create semi-trasnperent overlay of original outfit)
and click on brush tool.Make sure the foreground colour is white and brush is in color mode.We're doing this to make sure that outfit we're modifying will be in shades one colour 
9.Now,via lasso tool select the top of the outfit,it may take some time thought.Aftr you've done,click on image/adjustments/brightness / contrast
10.set the brightness 91 and contast 17.
You should get all of the outfit (except shoes in white now).Now,its time to paste texture to overlay.Mine didnt fit so i wont show you a picture example,but if you'll find one,click on select/all.
Then go back to texture and click edite/paste.Resize texture if you need by move tool (turn transfrorm controls on).Then click on window/layers.Set the opasity of your texture to like 40-50 %.It matters of texture what opasity to choose.
11.Now,here's the next step for ones that find texture not good enought to overlay.Paste your texture on outfit's texture and resize if you need it by move tool (turn transfrorm controls on)
you should get something like that
12.Now,lets make sure the whole shirt is covered by our texture.Click on clone stamp tool.Now,pick from hwre it should clone texture by clicking shift+alt buttoms.I suggest to pick are right above the area that mist be filled with texture
13.I didnt do it well,but since i did it only to show what to do..XD Anyway,refresh outfit in bodyshop
Not looking good? Its because we need to apply shading and add details.Dont worry,I'll show you everything ;)
14.Search online at images search for stuff that shirt must have-like buttons,belts,zips and stuff and add them to your texture.Save when you're done but dont close the texture file-we'll use the possibilities of layers in this tutorial
Looks better but still needs shading,righty?So..lets apply it!
15.Now,click on layer that is your texture.Set the foreground colour dark grey or black.Pick smooth brush (triangle to the right from thumbnail of brush/simple brushes/ smooth brushes begin from the middle of the list).Set it's size about 60 or less pixels and set opasity to 20 %.
16.Now,paint shade by brush where you feel they need to be-there should be 2-3
at the back,add shadow at every side of sleeves and paint a bit at front.Save outfit and refresh in bodyshop

Looks way better,right?Now,select the background layer and paste the jeans texture
17.You may either resize it or use delete the texture from areas it shouldnt be (like shoes).Plus,it makes the texture look neater ;)
Refresh outfit in boyshop.If you feel that jeans need shading-apply it.If you dont like it,via history window you may delete the shading =).Also,sometimes its good to play with brightness/contast.
18.Open alpha file.It isnt seen much with original version of outfit,but if you arent neat with texture you'll see
semi-transperent version of your texture near the neack of sim.Eww,right?
So thats why we've opened it ;)
See this grey area on the front of shirt?Paint it in black and save.Refresh outfit in bodyshop
So,another part of tutorial got completed ;)
*shoes were changed while making the tutorial via brightness and contast.I suggest to look for sneakers pics and paste one.Looks great ;) )
More tutorials are hopefully coming soon


 Limited Time Offer
 For a limited time only, we’re giving away a free